Building a Real-Time Starknet Data Monitor with QuickNode
How to get the most recent accepted block hash and number.
Introduction
Starknet, developed by Starkware, is a Layer 2 scaling solution for Ethereum. It aims to address the scalability issues of the Ethereum network by providing a platform for scalable and secure smart contracts and decentralized applications (dApps). QuickNode offers a powerful API service that allows developers to interact with the Starknet network efficiently. In this tutorial, we'll explore how to build a real-time Starknet data monitor using QuickNode's API.
Prerequisites
Before we begin, ensure you have the following:
Basic understanding of JavaScript.
Node.js installed on your system.
QuickNode API key. You can sign up for a free account on QuickNode.
Understanding QuickNode API
QuickNode provides an API service that allows developers to interact with various blockchain networks, including Starknet. One of the RPC methods provided by QuickNode for Starknet is starknet_blockHashAndNumber, which allows us to retrieve the most recent accepted block hash and number from the Starknet network.
Setting Up QuickNode API
First, you need to obtain your QuickNode API key. Sign up on the QuickNode website and obtain your API key from the dashboard.
QuickNode and Starknet: A Supercharged Alliance for dApp Development
Creating a JavaScript Project
Let's start by creating a new directory for our project and initializing a Node.js project:
bashCopy codemkdir starknet-monitor
cd starknet-monitor
npm init -y
Next, install the axios package, which we'll use to make HTTP requests to the QuickNode API:
npm install axios
Writing the JavaScript Code
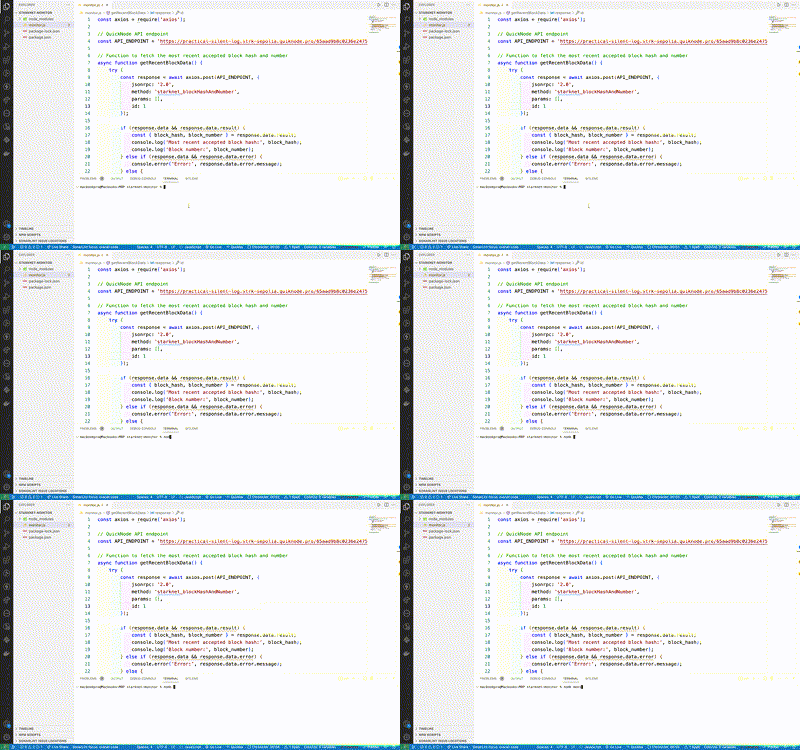
Create a new file named monitor.js and let's start writing the code:
const axios = require('axios');

// QuickNode API endpoint
const API_ENDPOINT = 'REPLACE_WITH_YOUR_STARKNET_ENDPOINT';

// Function to fetch the most recent accepted block hash and number
async function getRecentBlockData() {
    try {
        const response = await axios.post(API_ENDPOINT, {
            jsonrpc: '2.0',
            method: 'starknet_blockHashAndNumber',
            params: [],
            id: 1
        });

        if (response.data && response.data.result) {
            const { block_hash, block_number } = response.data.result;
            console.log('Most recent accepted block hash:', block_hash);
            console.log('Block number:', block_number);
        } else if (response.data && response.data.error) {
            console.error('Error:', response.data.error.message);
        } else {
            console.error('Unexpected response structure:', response.data);
        }
    } catch (error) {
        console.error('Error:', error.message);
    }
}

// Fetch block data every 5 seconds
setInterval(getRecentBlockData, 5000);
In this code snippet:
const axios = require('axios');- Imports the Axios library, enabling HTTP requests.
const API_ENDPOINT = 'https://starknet.quicknode.com/';- Sets the API endpoint for QuickNode's Starknet service.
async function getRecentBlockData() { ... }- Defines an asynchronous function to retrieve the latest block data.
try { ... } catch (error) { ... }- Sets up a try-catch block to handle potential errors.
const response = awaitaxios.post(API_ENDPOINT, { ... });- Sends a POST request to the QuickNode API to fetch block data.
if (response.data&&response.data.result) { ... } else if (response.data&&response.data.error) { ... } else { ... }- Checks if the response contains valid data or an error, handling each case accordingly.
const { block_hash, block_number } =response.data.result;- Extracts the block hash and block number from the response data.
console.log('Most recent accepted block hash:', block_hash);- Displays the most recent accepted block hash in the console.
console.log('Block number:', block_number);- Displays the block number in the console.
console.error('Error:',response.data.error.message);- Logs any errors encountered during the request to the console.
console.error('Unexpected response structure:',response.data);- Logs unexpected response structures for further analysis.
console.error('Error:', error.message);- Logs any errors thrown during execution to the console.
setInterval(getRecentBlockData, 5000);- Sets an interval to repeatedly fetch block data every 5 seconds.
Running the Monitor
To run the monitor, simply execute the following command in your terminal:
node monitor.js

This will continuously fetch the most recent accepted block hash and number from the Starknet network using QuickNode's API and display the data in the console every 5 seconds.

Conclusion
In this tutorial, we've learned how to build a real-time Starknet data monitor using QuickNode's API and JavaScript. QuickNode's API provides a convenient way to interact with Starknet and build powerful tools and applications. You can extend this monitor to track more data or integrate it into your existing applications for real-time updates on the Starknet network. With QuickNode's reliable infrastructure and easy-to-use API, developers can unlock the full potential of Starknet and build innovative solutions for the blockchain ecosystem.
Additional Resources
I'd love to connect with you on Twitter | LinkedIn | Instagram.
About QuickNode
QuickNode is dedicated to constructing the infrastructure necessary to uphold the forthcoming era of Web3. Since 2017, we've collaborated with numerous developers and organizations, facilitating the expansion of decentralized applications (dApps) and offering superior access to over 25 blockchains. Sign up for our newsletter to access further content similar to this and remain up-to-date with the latest developments in Web3!
